Marble Floor Installation in Columbus, OH
Our professional team delivers premium marble flooring solutions with meticulous attention to detail, ensuring your new floors become the centerpiece of your home. We understand that investing in marble is a significant decision, which is why we offer personalized consultations to help you select the perfect marble variety for your space and lifestyle.
As Columbus advances its environmental initiatives, we're proud to align our practices with eco-friendly standards. You can feel confident choosing our services knowing we implement green practices throughout our installation process. Many of our customers appreciate that we take the time to explain the unique characteristics of marble flooring, including its natural variations and proper maintenance requirements. This education helps you make the most of your investment for years to come.
Marble Flooring Types and Styles
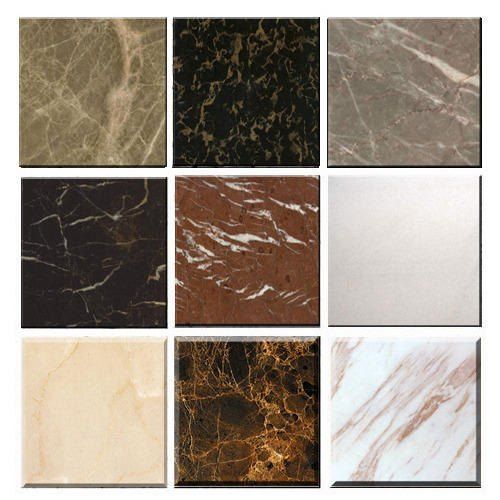
Carrara marble remains one of our most requested options, featuring soft gray veining on a white background. Many of our clients prefer this Italian classic for its affordability and versatility. Calacatta marble offers more dramatic, bold veining patterns that make striking statements in entryways and formal spaces.
Nero Marquina provides a deep black background with distinctive white veining. We've installed this dramatic marble in many luxury properties in Columbus.
Emperador marble comes in light and dark brown variations with subtle veining, perfect for creating warm, inviting spaces. Statuario marble, with its bright white background and gold-gray veining, remains popular for those seeking luxury.
We source our marble tiles from quality quarries to ensure consistency in color and pattern.
Marble Tile Types
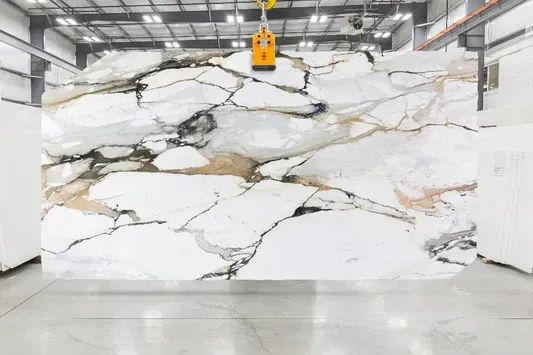
Marble slab flooring creates a seamless, luxurious appearance that tile cannot match. We recommend slabs for larger areas like grand foyers and spacious living rooms. The continuous surface without grout lines creates a smooth, unified look.
Installation of marble slabs requires specialized expertise, which our team possesses. Each slab is carefully selected, cut, and polished before precise placement. The bookmatched technique, where we mirror two adjacent slabs cut from the same block, creates stunning symmetrical patterns.
Slab flooring provides unmatched elegance. We often combine slabs for central areas with coordinating tiles for peripheral spaces to balance budget and aesthetics. Marble slabs also allow for custom edges and transitions between rooms, creating a truly bespoke flooring solution for your home.
Marble Slab Flooring
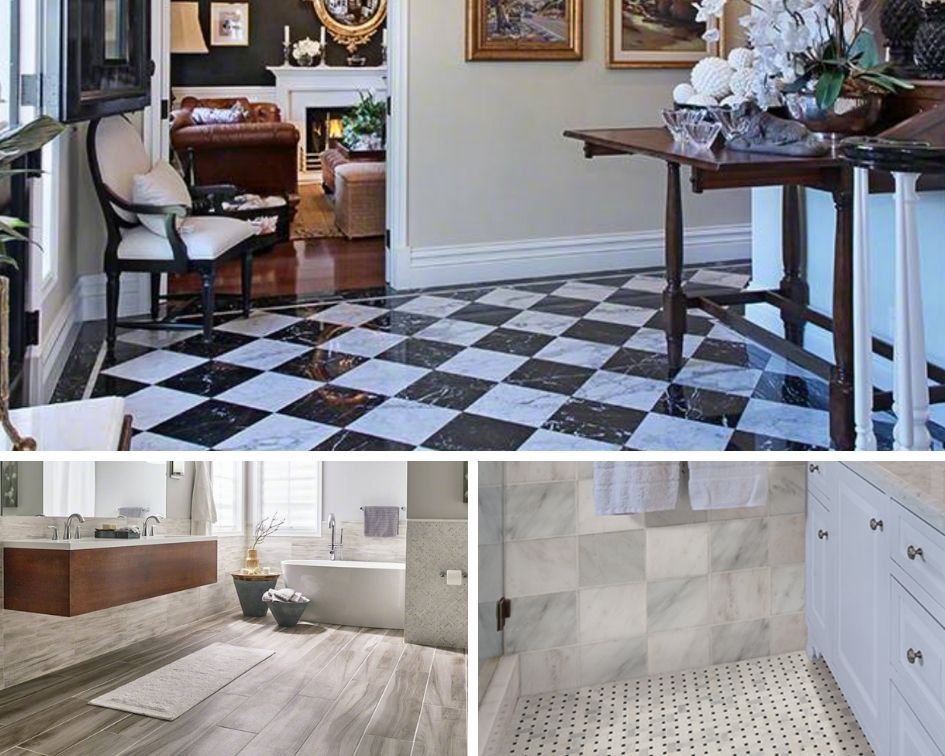
The pattern you choose significantly impacts the final look of your marble floor. A simple grid pattern suits modern spaces, while the herringbone pattern adds visual interest and a sense of movement. We've installed stunning chevron patterns in colonial homes throughout Columbus.
Basketweave patterns combine different sizes or colors of marble for a textured, dimensional look. For truly luxurious installations, we create custom inlays and medallions that serve as focal points in entryways or dining rooms.
Marble borders define spaces within open floor plans or frame specific areas. These decorative elements can incorporate contrasting marble types or complementary stones like onyx or travertine.
Marble mosaics use small pieces to create intricate designs, perfect for bathroom floors or entryway accents. Our craftsmen excel at precision cutting and placement for flawless execution of complex patterns.
Marble Floor Patterns and Designs
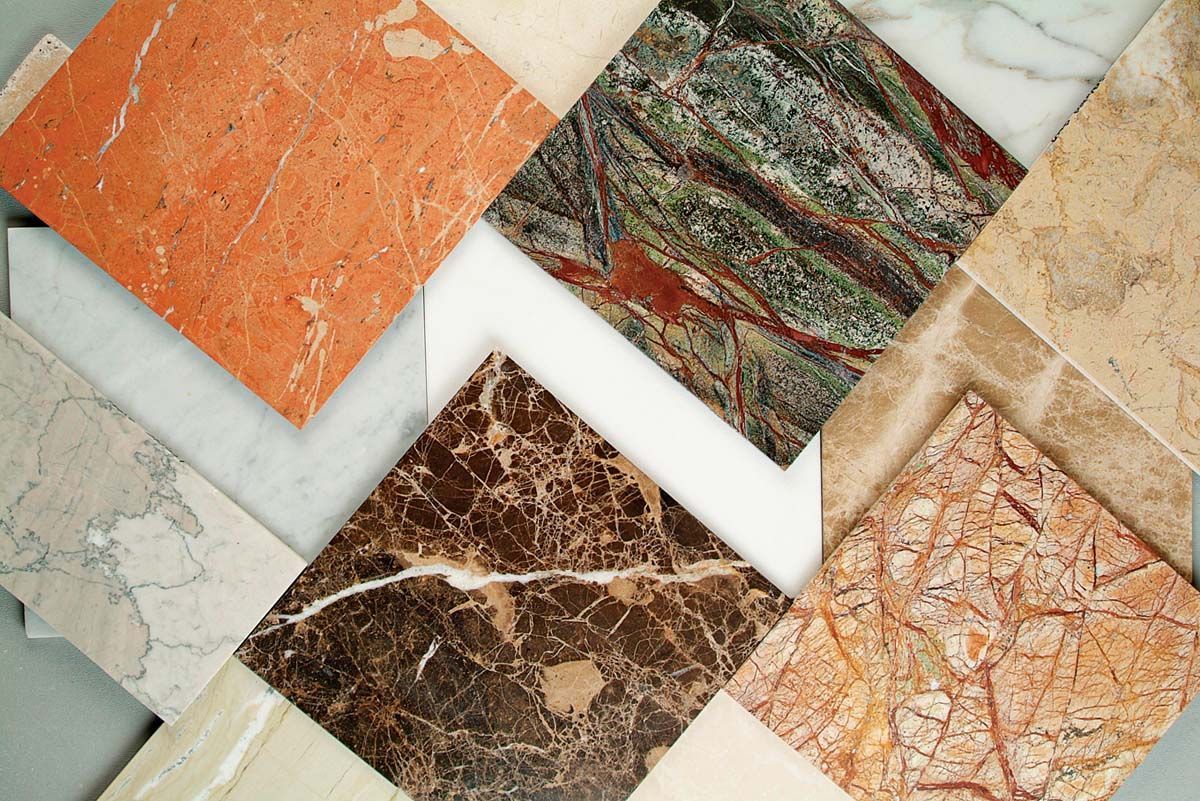
White marble flooring creates bright, airy spaces. Varieties like Thassos (pure white) or White Carrara (white with gray veining) remain consistently popular in Columbus homes. These lighter options help smaller spaces feel larger and more open.
Black marble options like Nero Marquina add drama and sophistication. We often install these in formal dining rooms and executive offices. Grey marbles like Bardiglio offer a neutral, versatile option that complements most design styles.
Beige and cream marbles, including Crema Marfil and Botticino, provide warmth without overwhelming a space. These subtle options work beautifully in traditional homes.
Color Variations in Marble
Our Marble Floor Installation Process
Our experienced team follows a meticulous approach that guarantees precision at every step.
1. Assessing the Subfloor
We always begin by thoroughly examining your existing subfloor. A stable, level foundation is crucial for marble installation. We check for cracks, moisture issues, and uneven areas that could compromise your new floor. For concrete subfloors, we test moisture levels using specialized meters—marble requires a reading below 3% to prevent future problems.
If your subfloor isn't perfectly level, we apply a self-leveling compound to create a smooth surface. This step prevents lippage between tiles and ensures proper adhesion. For wooden subfloors, we verify structural integrity and may recommend adding a cement backer board for stability.
We also check floor height clearances for doors and transitions to other flooring types. Marble and adhesive typically add 3/4" to 1" of height, which might require door adjustments.
2. Installation Surface Preparation
The final preparation step involves meticulous cleaning and priming of the installation area. We remove all debris, dust, and contaminants from the subfloor. Any old adhesive residue must be completely stripped away to ensure proper bonding.
For concrete surfaces, we often apply a primer to improve adhesion. In moisture-prone areas like bathrooms, we install waterproofing membranes that protect both the subfloor and marble from water damage.
Temperature and humidity conditions matter too. We maintain the installation area between 65-75°F with moderate humidity for at least 48 hours before installation begins. This acclimation period helps prevent expansion or contraction issues after installation.
We also create detailed layout plans before starting. This helps minimize cuts, centers patterns properly, and creates visual balance in the room. For complex patterns like herringbone or Versailles, pre-planning is absolutely essential.
3. Preparing the Marble Tiles and Slabs
We begin by carefully inspecting each marble tile and slab for quality and consistency. Our team measures your space accurately and creates a detailed layout plan that maximizes the natural beauty of the marble while minimizing waste. This planning stage is crucial for creating the perfect pattern flow, especially with veined marble varieties.
We prepare your subfloor meticulously, ensuring it's completely level, clean, and free of any debris. For concrete subfloors, we apply a moisture barrier to prevent future damage. When installing over plywood, we add a cement backer board to create a stable foundation that prevents flexing.
Temperature acclimation is essential for marble. We allow the tiles to rest in your space for 24-48 hours before installation to adjust to the environment's humidity and temperature.
4. Marble Tile and Slab Laying Sequence
We use a systematic laying sequence that follows our pre-planned layout design. Starting from the center of the room, we work outward to ensure perfect alignment and symmetry throughout the space. This approach helps maintain consistent grout lines and prevents awkward cuts around the perimeter.
For larger marble slabs, we employ special lifting equipment and techniques to safely position each piece without damage. Our team pays particular attention to pattern matching with veined marble, aligning the natural patterns to create a seamless, flowing appearance.
We install marble floor transition pieces where your marble meets other flooring materials, ensuring smooth, safe transitions. Special care is taken around corners and edges to maintain visual continuity while providing proper support for the marble.
5. Applying Marble Adhesive and Grout
We use premium marble-specific adhesives that provide strong bonding without staining the natural stone. Our technicians apply the adhesive with notched trowels to ensure even distribution and proper coverage for maximum adhesion.
The adhesive is allowed to cure following manufacturer specifications before grouting begins. This typically takes 24-48 hours depending on environmental conditions. During grouting, we use marble-compatible grout that complements your stone's color and pattern.
Grout lines are kept consistent using professional spacing tools. For a more seamless look, we can create minimal grout lines with carefully fitted edges. Our team seals the grout after application to prevent staining and moisture penetration.
6. Detailing and Finish Work
Once installation is complete, we focus on the finishing details that truly elevate your marble flooring. Edge trim installation provides a clean, finished look along walls and transitions. For staircases, we install specialized marble step nosing for both safety and visual appeal.
We apply a high-quality marble sealant to protect against stains and moisture. Multiple coats ensure maximum protection while preserving the stone's natural beauty. The sealant helps prevent etching from acidic substances and makes routine cleaning easier.
Our final inspection checks for any imperfections, ensuring proper adhesion, consistent grout lines, and perfect alignment. We clean the entire floor thoroughly using marble-safe products that remove any installation residue without damaging the stone's surface.
7. Daily and Routine Care
Daily cleaning of your marble floors requires gentle methods to avoid damage. We recommend using a soft, dry dust mop or microfiber cloth to remove dirt and debris. For wet cleaning, use only pH-neutral cleaners specifically designed for natural stone. Never use vinegar, lemon, or other acidic cleaners as they will etch the marble surface.
For spills, immediate action is crucial. Blot—don't wipe—liquids to prevent spreading. This is especially important with acidic substances like wine, coffee, or fruit juices that can damage the surface instantly.
When mopping, use warm water with a small amount of stone-specific cleaner. Avoid excess water, as marble can absorb moisture. Always dry the floor after cleaning to prevent water spots.
Navigation

All Rights Reserved | Columbus Flooring Company